Introduction
Floating shelves are a stylish and functional way to display décor, organize essentials, and add a modern touch to any room. While store-bought versions can be expensive, making your own DIY floating shelves is surprisingly affordable and easy.
Whether you want to enhance your living room, kitchen, bathroom, or office, this step-by-step guide will help you create custom floating shelves that look professionally made—without the high price tag!
Tools & Materials Needed
✅ Wood Planks (Pine, Oak, or Plywood) – Choose your desired size & thickness
✅ Wood Screws or Pocket Hole Screws (2.5 inches recommended)
✅ Wall Anchors (for drywall installation)
✅ Drill & Drill Bits
✅ Stud Finder (to secure shelves into studs for strength)
✅ Level (to ensure straight shelves)
✅ Sandpaper or Orbital Sander
✅ Wood Stain or Paint (to match your décor)
✅ Paintbrush or Rag (for staining/painting)
✅ L-Brackets or Hidden Brackets (for mounting support)
✅ Measuring Tape & Pencil
💡 Tip: Choose thicker, high-quality wood if you plan to store heavier items like books or kitchenware.
Step 1: Decide on Shelf Dimensions
Before Cutting the Wood, Consider:
✔ Shelf Length – Measure the wall space where the shelf will go.
✔ Shelf Depth – Typical floating shelves range from 6-12 inches deep.
✔ Thickness of Wood – 1-2 inches is standard for a sturdy look.
✏ Mark the dimensions on your wood plank before cutting.
Step 2: Cut & Sand the Wood
1️⃣ Cut the wood to your desired length using a circular saw or handsaw.
2️⃣ Smooth the edges and surface using sandpaper or an orbital sander.
3️⃣ Wipe off excess dust with a dry cloth.
💡 Tip: If you want rustic shelves, keep some natural imperfections in the wood.

Step 3: Stain or Paint the Shelves
1️⃣ Choose a stain color (for a natural wood look) or paint color (for a modern aesthetic).
2️⃣ Use a paintbrush or a rag to apply the stain evenly.
3️⃣ Let the shelves dry for 24 hours before mounting.
💡 Tip: Matte black or white paint creates a modern, minimalist look, while a walnut stain gives a warm, classic finish.

Step 4: Find the Studs & Mark Placement
1️⃣ Use a stud finder to locate wall studs – these provide the strongest support.
2️⃣ Mark the exact height and position of each shelf with a pencil.
3️⃣ Use a level to ensure perfectly straight alignment.
💡 Tip: If you can’t attach shelves to studs, use wall anchors for extra support.

Step 5: Attach Brackets to the Wall
🔩 For L-Brackets (Visible Mounting):
1️⃣ Position L-brackets on the wall at the stud locations.
2️⃣ Drill pilot holes, then secure the brackets with screws.
3️⃣ Make sure they are level and evenly spaced.
🔩 For Hidden Brackets (True Floating Look):
1️⃣ Attach hidden brackets into the wall studs.
2️⃣ Drill corresponding holes on the back of your shelf to fit the bracket pegs.
3️⃣ Slide the shelves onto the pegs for a seamless, floating look.
💡 Tip: If using L-brackets, choose black or gold hardware for an industrial-chic finish.

Step 6: Secure the Shelves to the Brackets
1️⃣ Place the shelf on top of the brackets.
2️⃣ Drill small pilot holes on the underside of the shelf.
3️⃣ Use screws to attach the shelf securely to the brackets.
💡 Tip: If using hidden brackets, test the shelf’s strength before placing heavy objects.

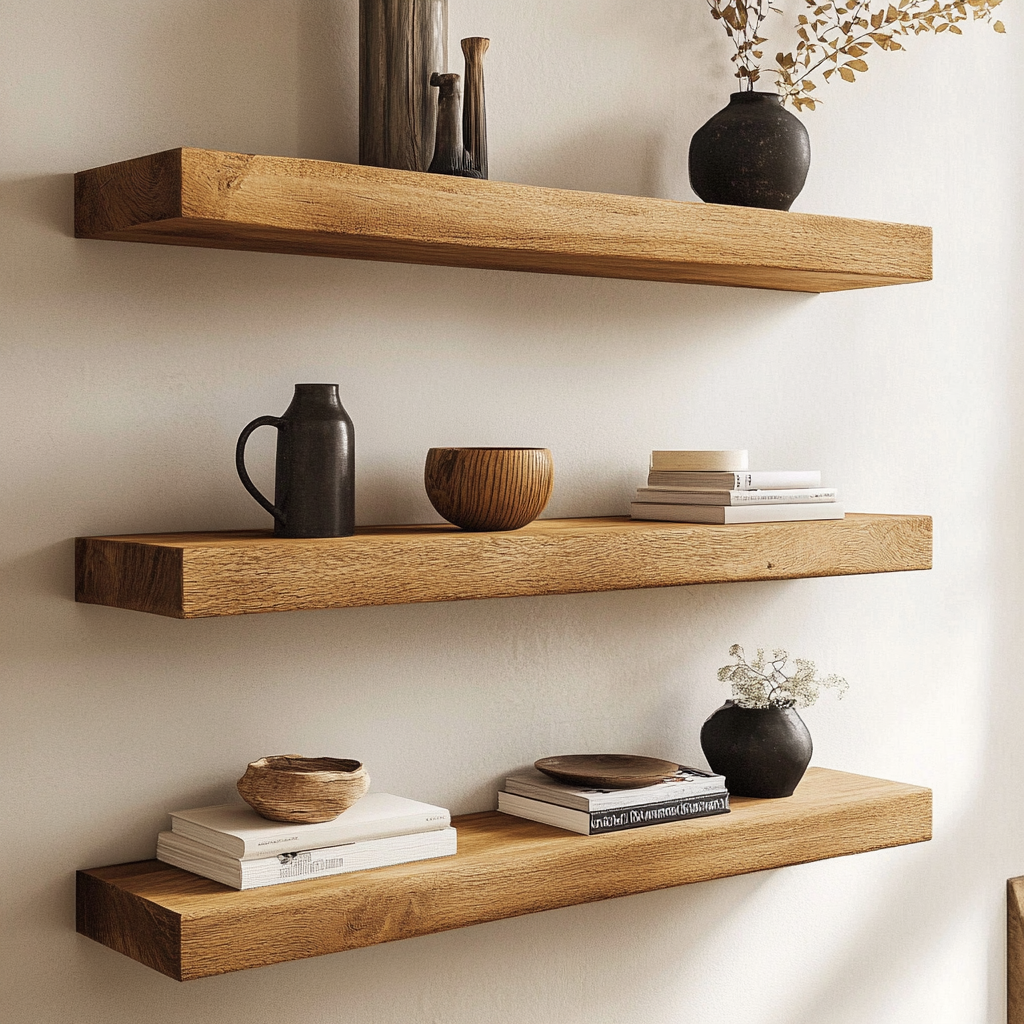
Step 7: Style & Enjoy Your Floating Shelves!
✔ Add books, plants, candles, and framed art to enhance your décor.
✔ Keep a balance between functionality and aesthetics – avoid cluttering.
✔ Use matching décor elements (wood tones, color schemes) for a cohesive look.

Creative Ideas for Floating Shelves
💡 Living Room: Display framed photos, small sculptures, and candles.
💡 Kitchen: Use for dishware, mugs, or spice jars.
💡 Bathroom: Organize toiletries, hand towels, or small plants.
💡 Bedroom: Create a floating nightstand for books and a bedside lamp.
💡 Office: Organize work essentials with stylish storage baskets.
Final Thoughts
DIY floating shelves are an easy, stylish, and budget-friendly way to upgrade your space. Whether you’re going for a modern, rustic, or minimalist look, these shelves can be customized to fit your home perfectly.
🔨 Now it’s your turn! Which room will you install floating shelves in first? Let us know in the comments! 😊